Worked with a full crew to design and construct wearable, wireless lighting for Duke's Fall 2025 Mainstage
This one has it all:
- The Divine Simpsons!
- A Moravian Star!
- Symbolization of the reclamation of nature!
- and of course, USB-C.
Project Summary
To support my Graduation with Distinction project at Duke University, I implemented wearable lighting into a series of headpieces constructed for the Theater Studies department’s Fall 2025 mainstage production of Mr. Burns, a post electric play directed by Jeff Storer. Act III of Mr. Burns is set in a post-post-apocalypse, where the antediluvian TV show “The Simpsons” has matured into myth. The production’s costume designer Derrick Iveys envisioned radical re-interpretations of the classic designs of the four main Simpsons — Homer, Marge, Bart, Lisa — each of which included an ornamental and almost religious headpiece that would light up in the show’s final image. These Act III designs were lovingly referred to in the costume shop as ‘The Divine Simpsons’.
I had varying levels of involvement in the construction and design of each headpiece, from sewing a strip of LEDs into a finished prop to modeling and printing a crown from the ground up. I also designed and constructed a wireless DMX transmitter to allow the headpieces to be controlled from the theater’s lighting console.
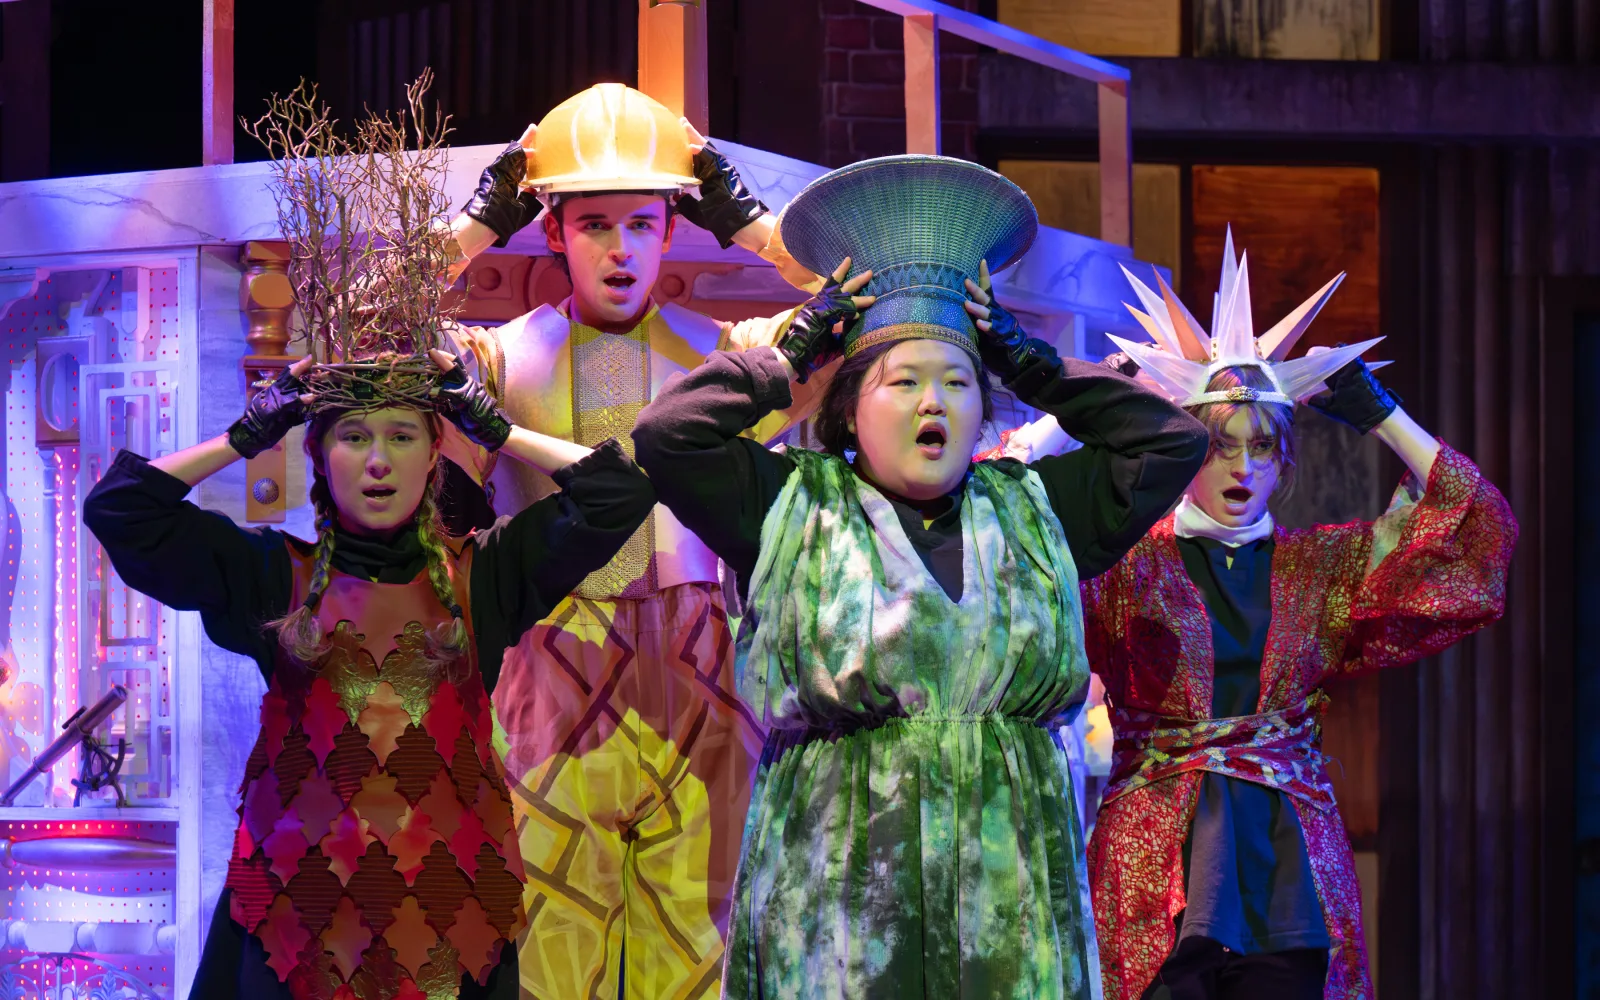
The 'Divine Simpsons'. Photo by Huth Photo.
Control
The first significant undertaking of my work on Mr. Burns was the design of a new wireless DMX transmitter. DMX is the industry standard protocol for communicating with lighting devices, and was the more straightforward way to have my devices controlled by a lighting console.
Many solutions for wireless DMX already exist — from proprietary transmitter sets that essentially function as “invisible cables” to sCAN, the official standard for broadcasting DMX over Wifi. Even so, I chose to design my own system for Mr. Burns. My reasoning behind this was that since I was directly involved with the production, I could design a system focused on simplicity for the end-user while I did all the configuration myself beforehand, hardcoded for that specific production. This would produce an extremely fault-tolerant system that still presented to performers, designers, and board operators as “plug and play”.
To achieve this design, I chose to use a hard-wired transmitter that broadcast directly to the headdresses via ESP-NOW. I had used ESP-NOW to broadcast DMX values before, when developing lights for Rebecca Wahls’ GOOD in the spring of 2025. The advantages of ESP-NOW in many ways model those of the DMX standard: I can have a wireless transmitter plugged into the board, screaming out a list of brightness and color values, and then simply tell any devices capable of listening what they should react to, should they hear something. No routers, passwords, or connection procedures, and a what-you-see-is-what-you-get experience for the board operator.
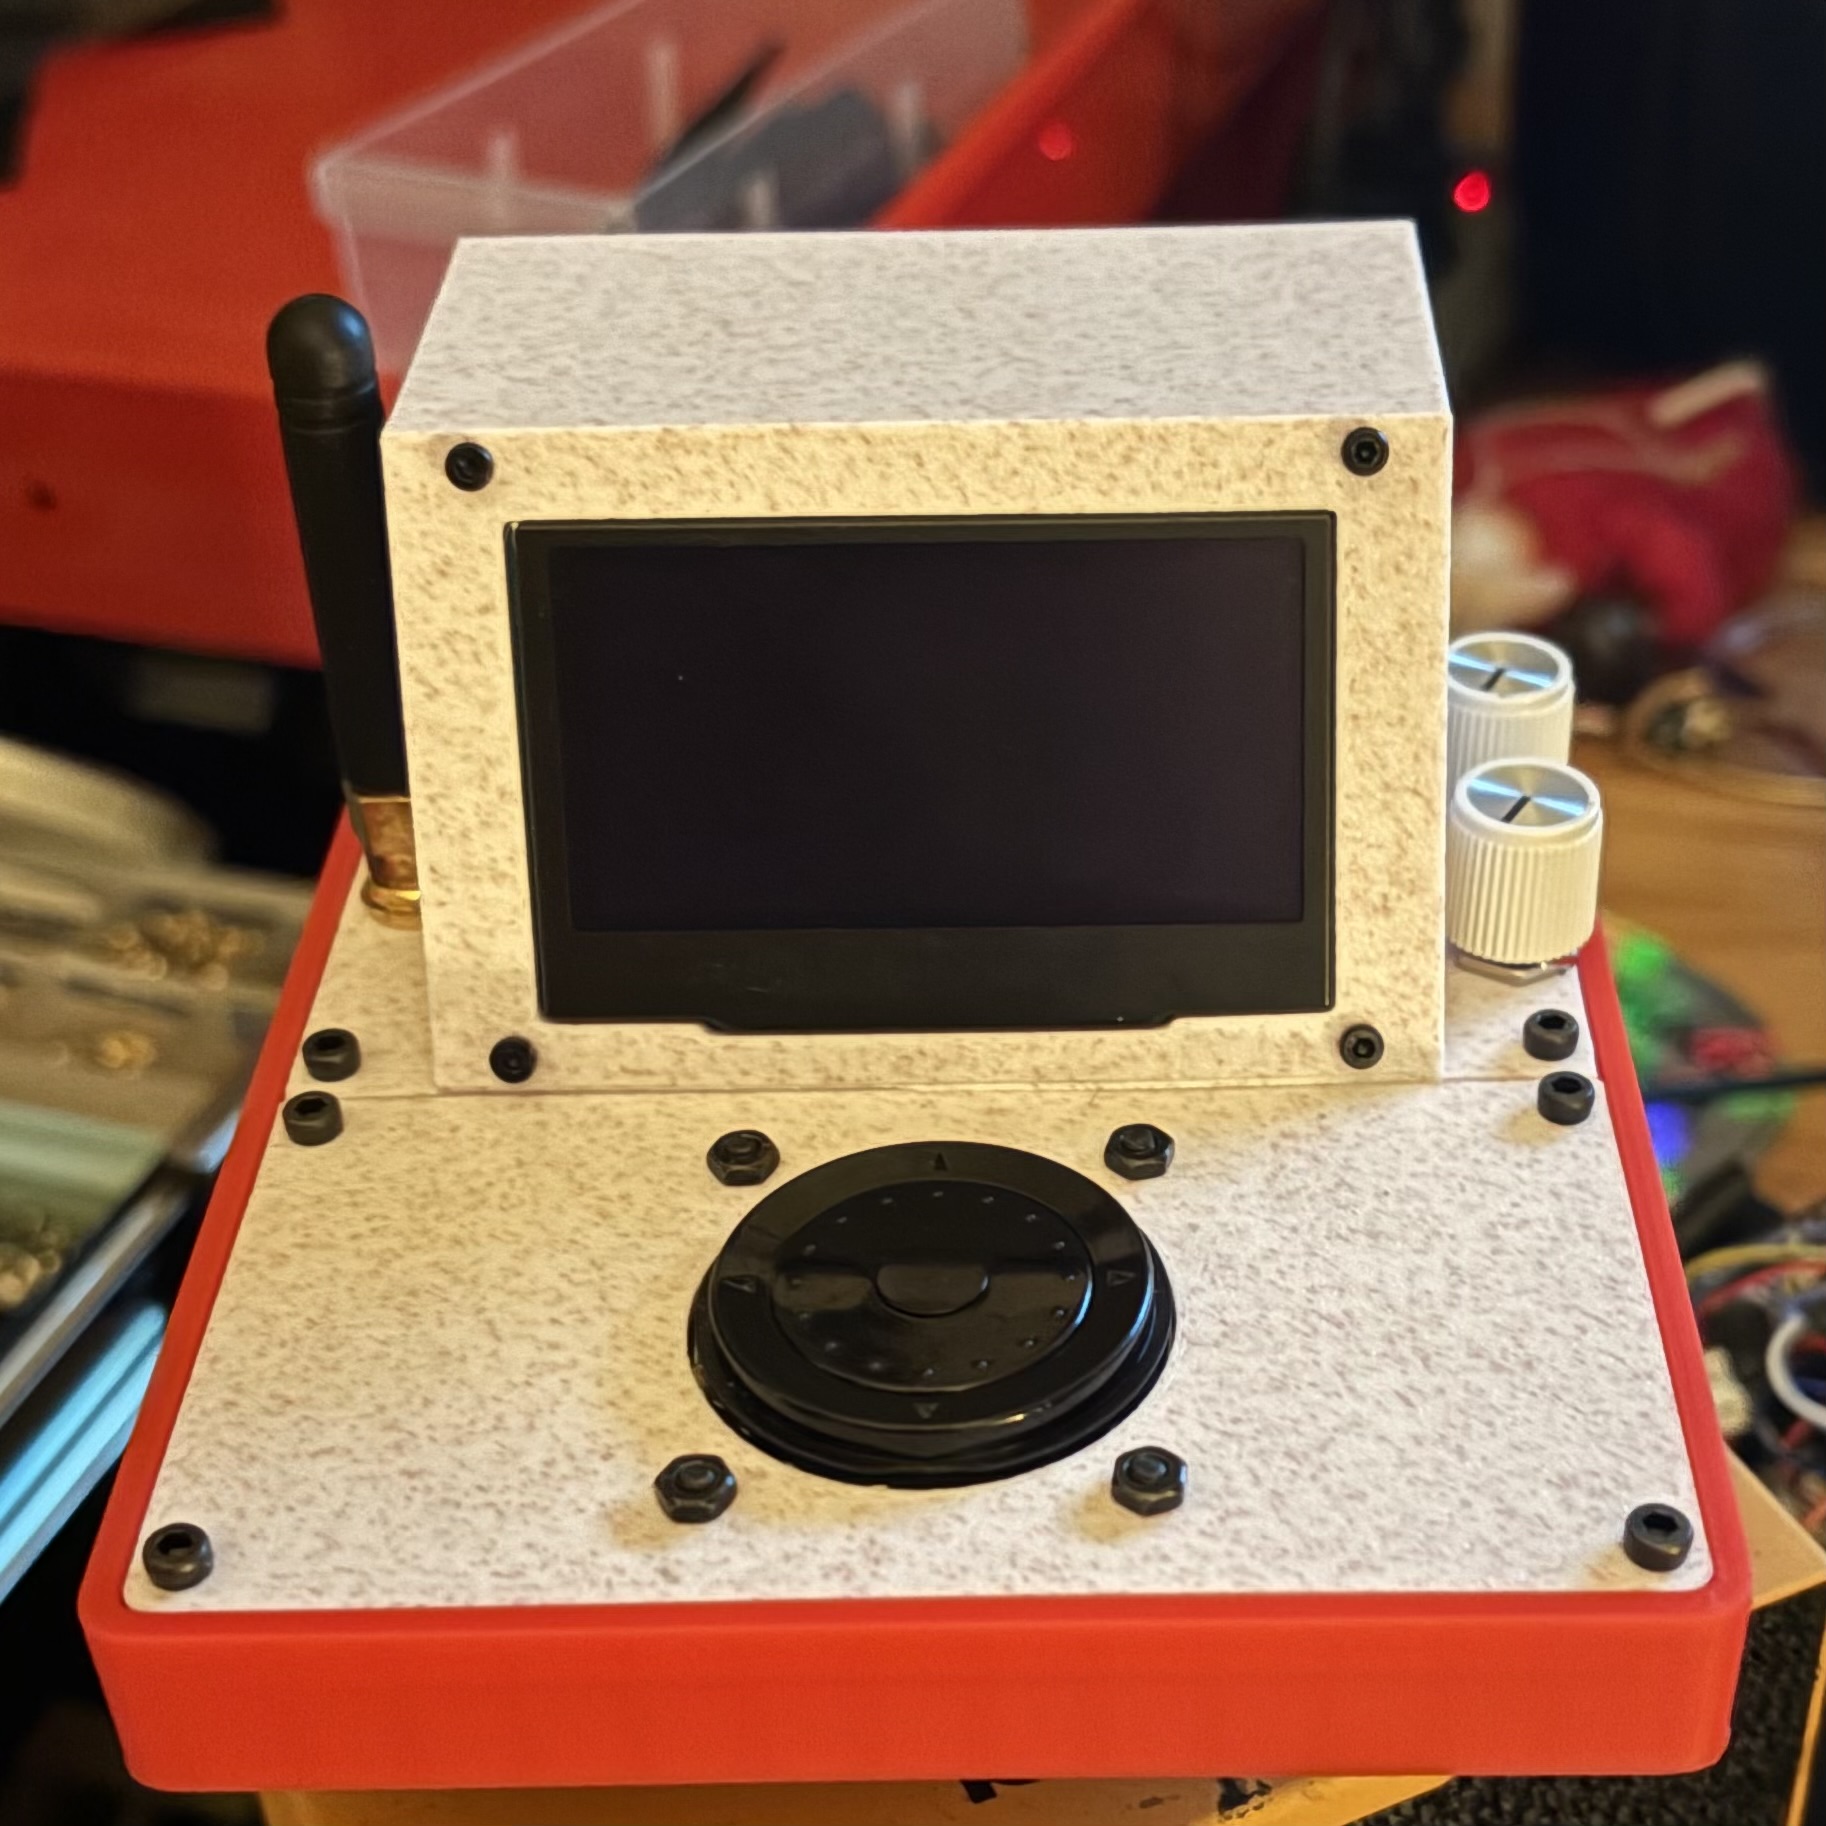
The transmitter that made it into the show was the last in a series of iterations. The face was redesigned so that the “iPod-like” navigation wheel was flush with the surface, and the screws attaching the body pieces together were inserted into the underside, recessed into the base for a very clean look. I obtained a new display of the same type I originally wanted to use (a low resolution OLED) which allowed for live monitoring of all the data the device was streaming, as well as arbitrary address setting using the navigation wheel. This design used tire weights in the base and rubber feet on the underside to maintain a strong grip with the table. The backside had a flush DMX port as well as a small blackout switch. I thought the new colors were apt for the production — they evoked either ‘starlight’, or ‘Homer Simpson’ — both of which were appropriate. When the DMX input was disconnected, the screen would display “D’oh!”
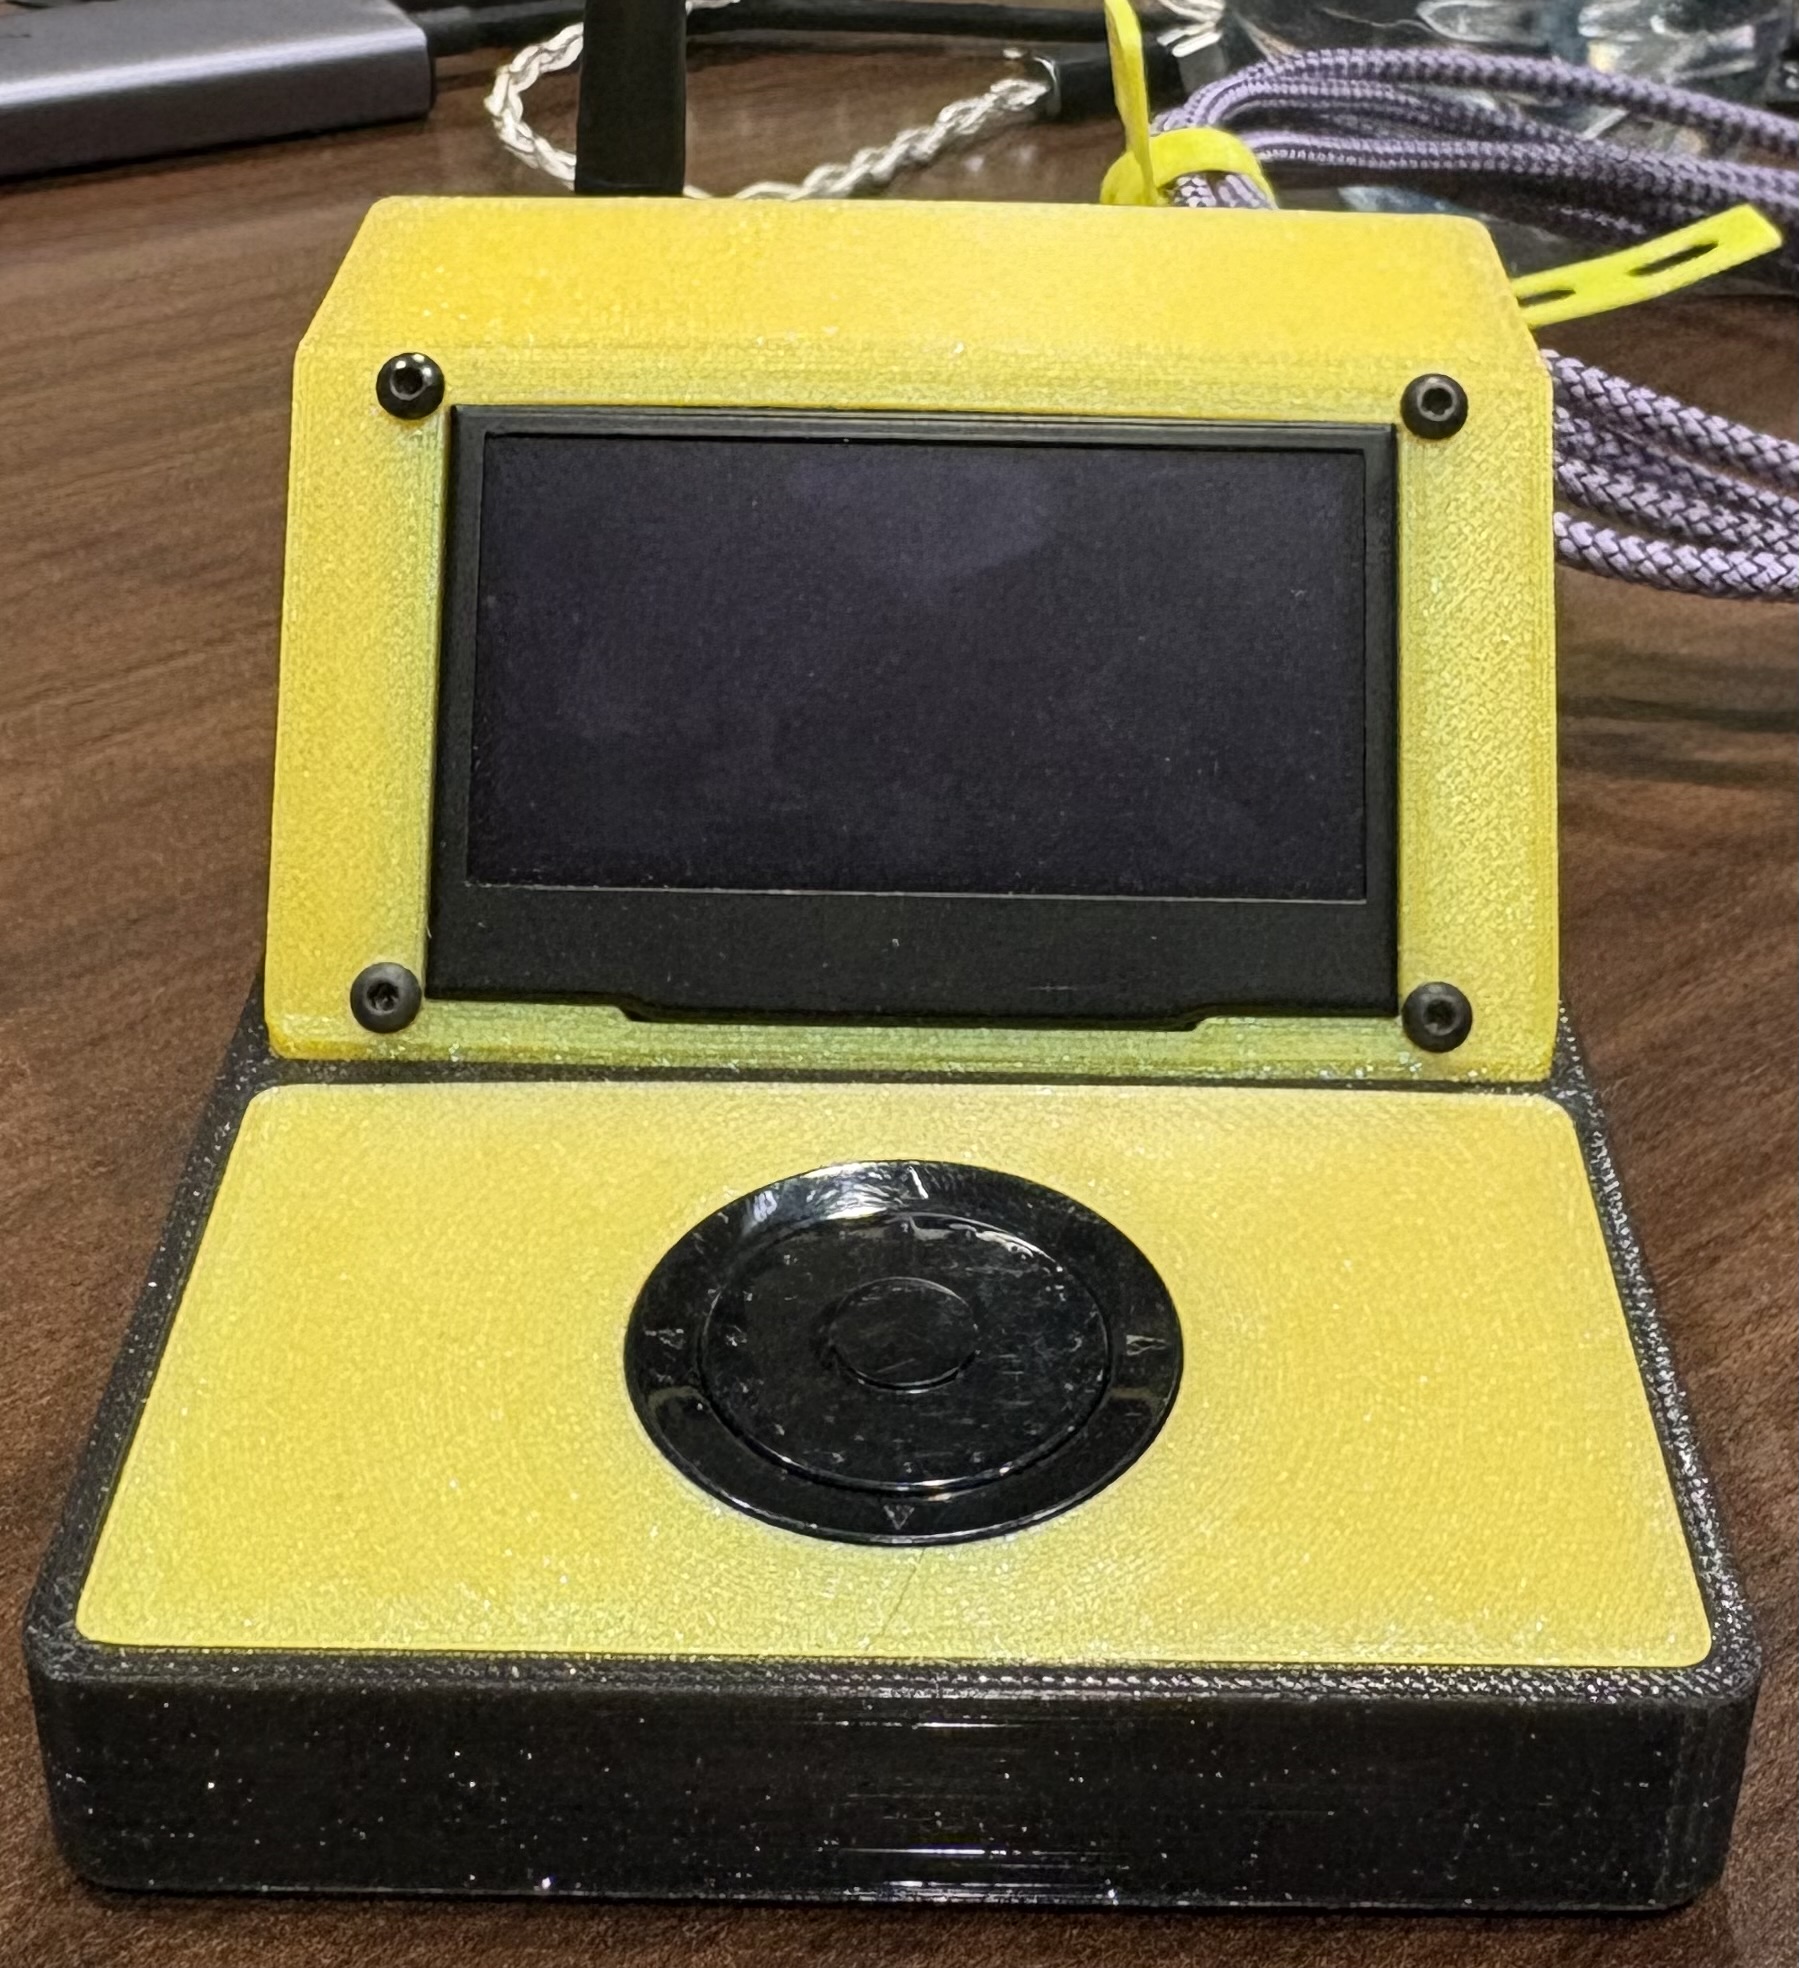
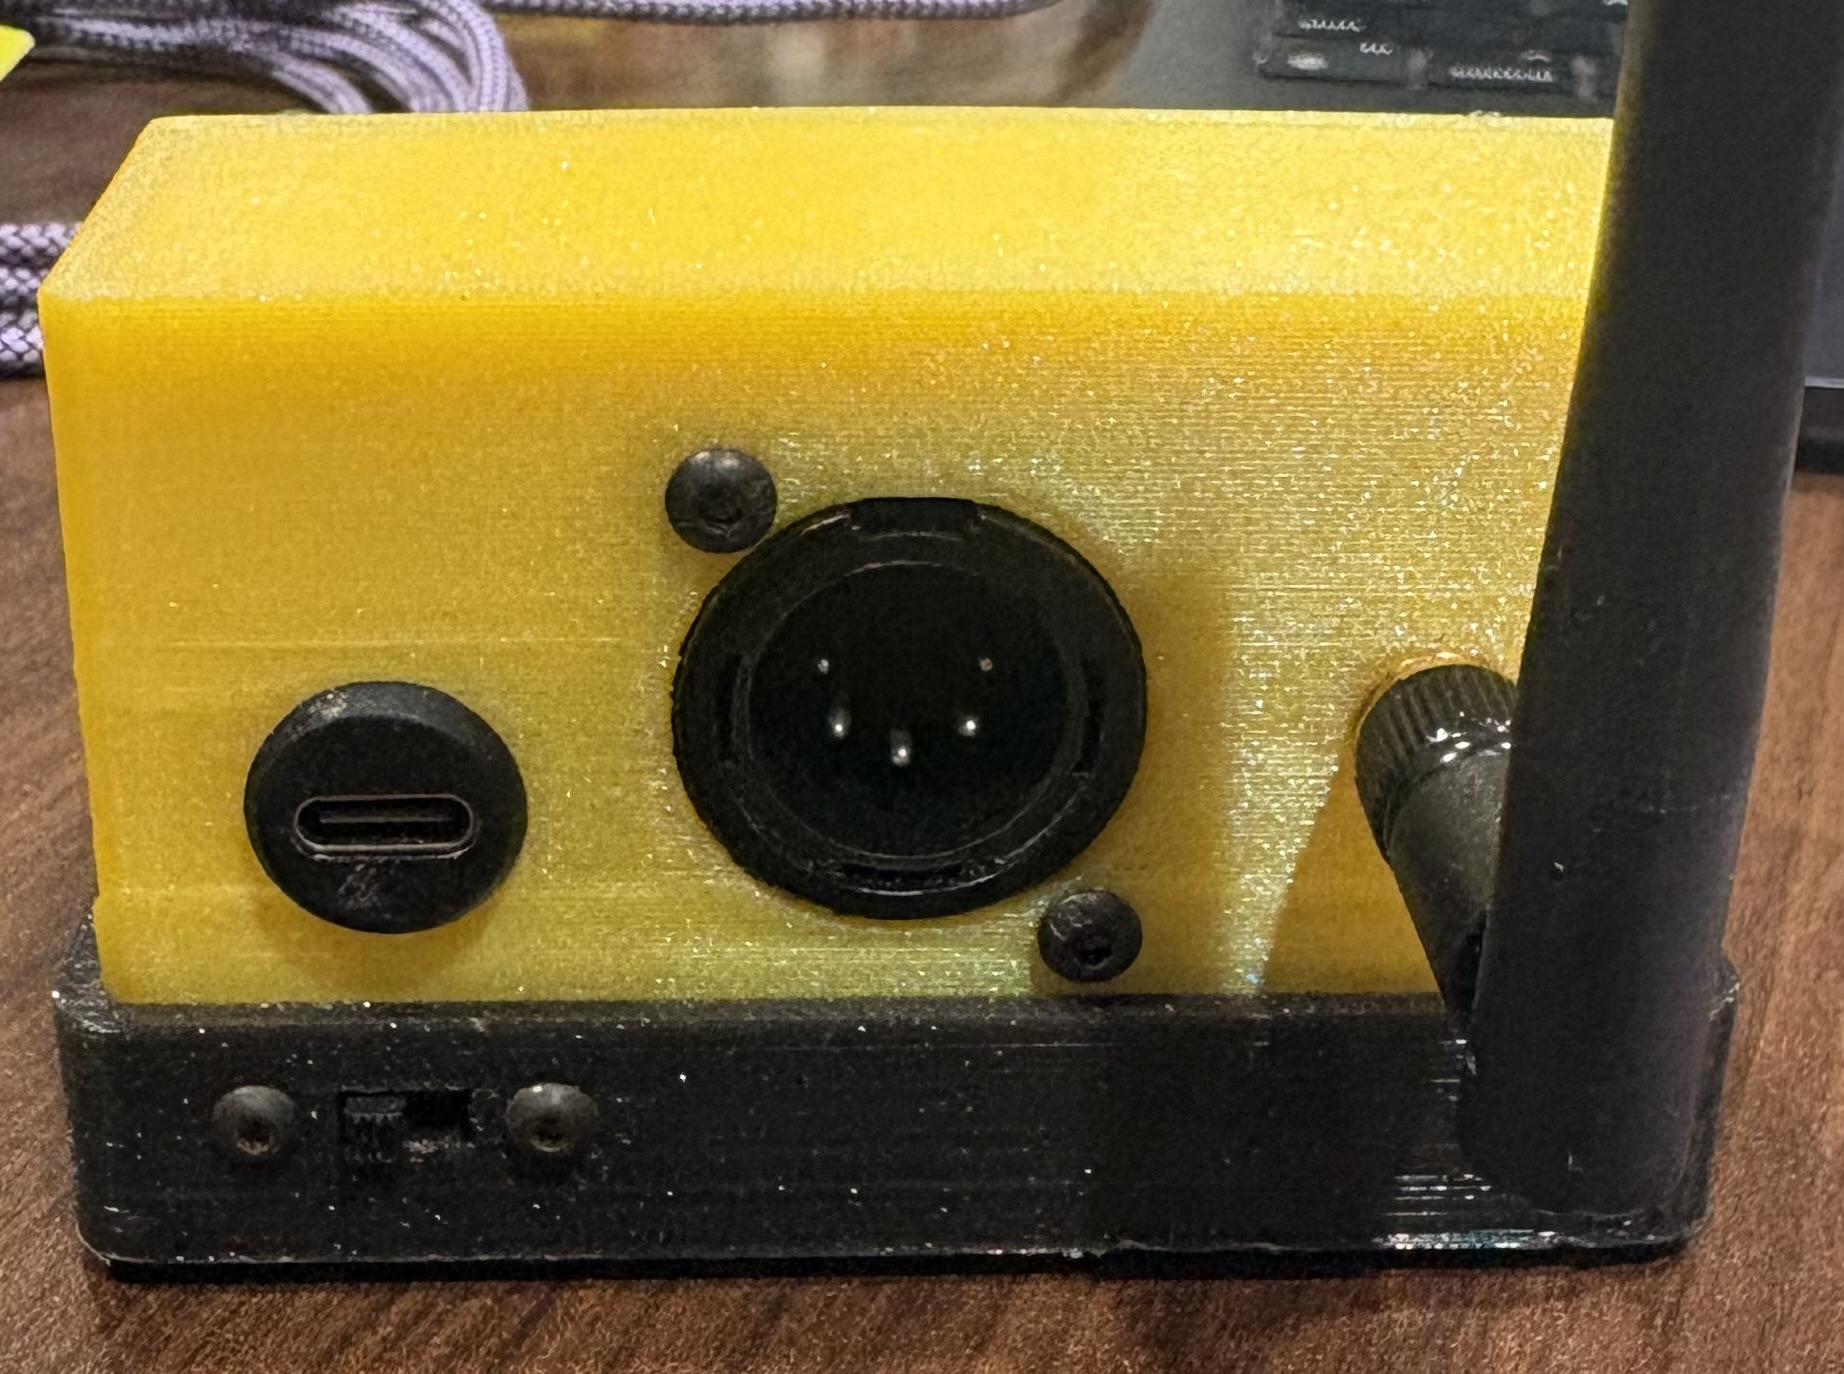
The transmitter used for Mr. Burns — front and back.
That final unit was the latest in a long line of revisions. The first was the design built for GOOD; the limited display meant each input method had a very specific command, and the size difference between its USB-C input and its massive DMX jack meant it had a tendency to rest on its side. The first of 3 designs in the 25-26 academic year introduced new features such as a weighted base to prevent torque from the large DMX cable causing it to slide around the tech table, but was ultimately redesigned because the screen was nonfunctional (I received a broken part) and the knobs on the side were too difficult to manipulate. The next design decreased width by making the weights dictate the length of the device, and was the first design to place the antenna on the back and to fully embrace the two-tone look — but its screen was simply too small to display any more than one piece of information when viewed from a standard distance, and for that reason I redesigned/remade the transmitter for a final time.
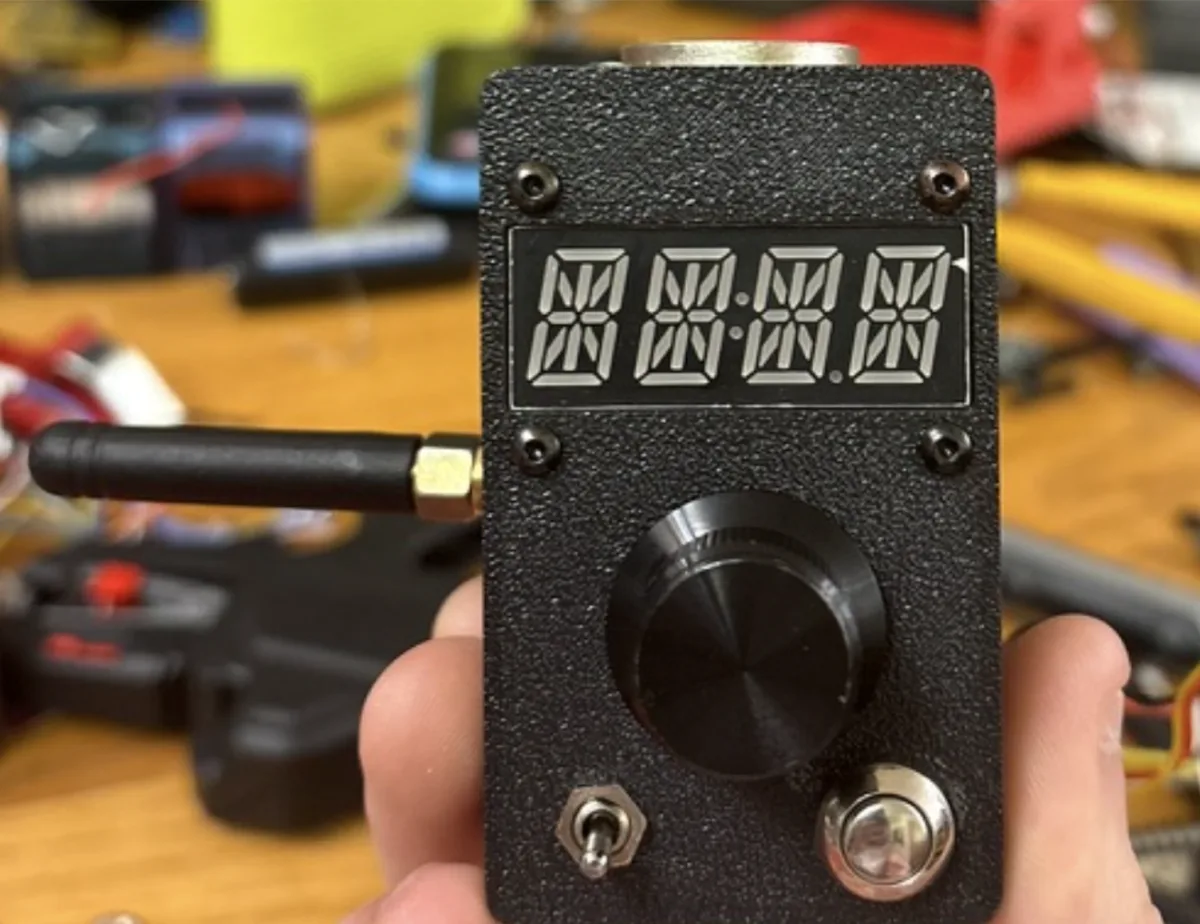
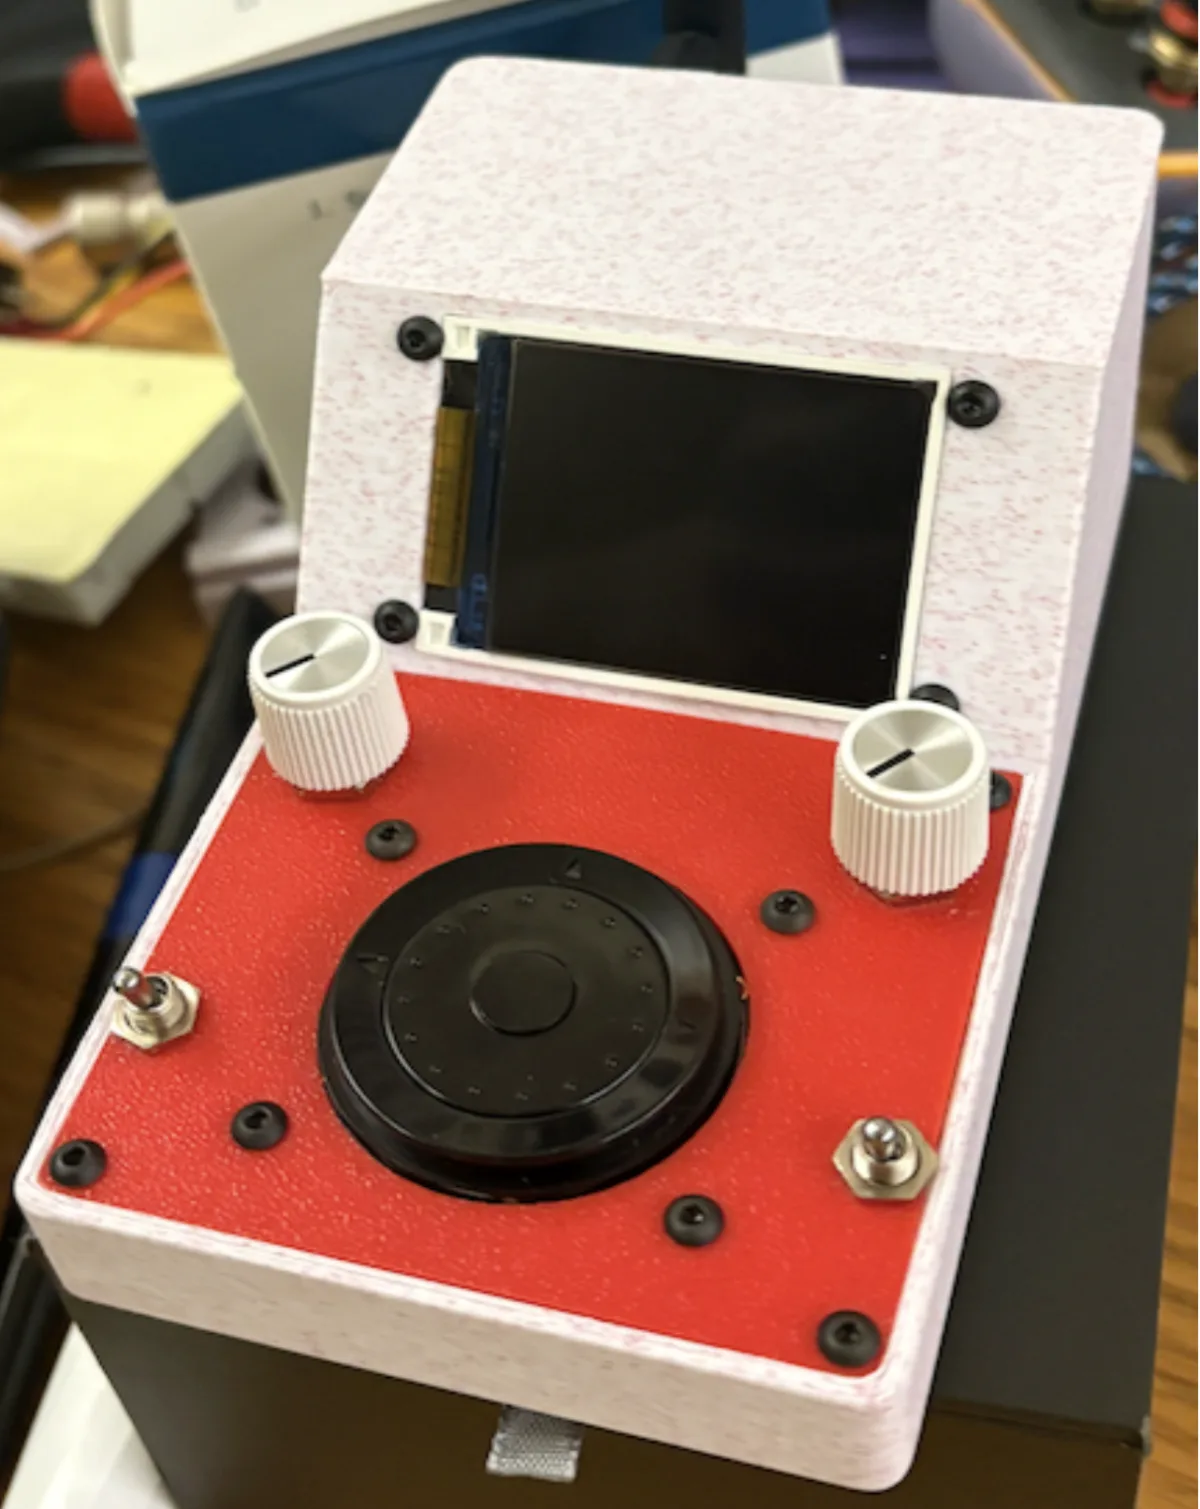
Left to right: the design built for *GOOD*; the first revision of the 25-26 year, with its weighted base; the narrower two-tone design; and the final unit used for *Mr. Burns*.
The Divine Simpsons
Bart's Twig Crown
Bart’s crown was the headpiece I had the least involvement in, in construction as well as design. The beautiful twig crown was a fully formed costume element by the time I first touched it. To add lights, I sewed a side-emitting led strip onto the inside edge of the crown, at the transition from headband to twig spines. Bart’s crown had the lowest lumen intensity of the 4 pieces, though this was mostly because I was able to drive the other 3 at much higher brightness levels than I originally anticipated, not because the crown had any deficiencies. Part of the reason I was so hands-off on this piece is because it was the perfect candidate for the PCBs I had already manufactured for the production.
These boards prioritized small size over nearly everything and featured a single output that exposed two general purpose input/output pins and was capable of supplying 1.5A @ 3.3V. This made them excellent for the twig crown, which used a single LED strip and had a small space in the back between the headband and horizontal twig rings where the board and battery could be tucked away. The LED strip used in the design had individually addressable RGB LEDs, and so to simplify control while still offering flexibility to the lighting designer, the transmitter was programmed to have Bart’s crown appear as a fixture with three RGB lights, and the receiver microcontroller in the crown made a 3-color gradient around the inner circumference based on those values.
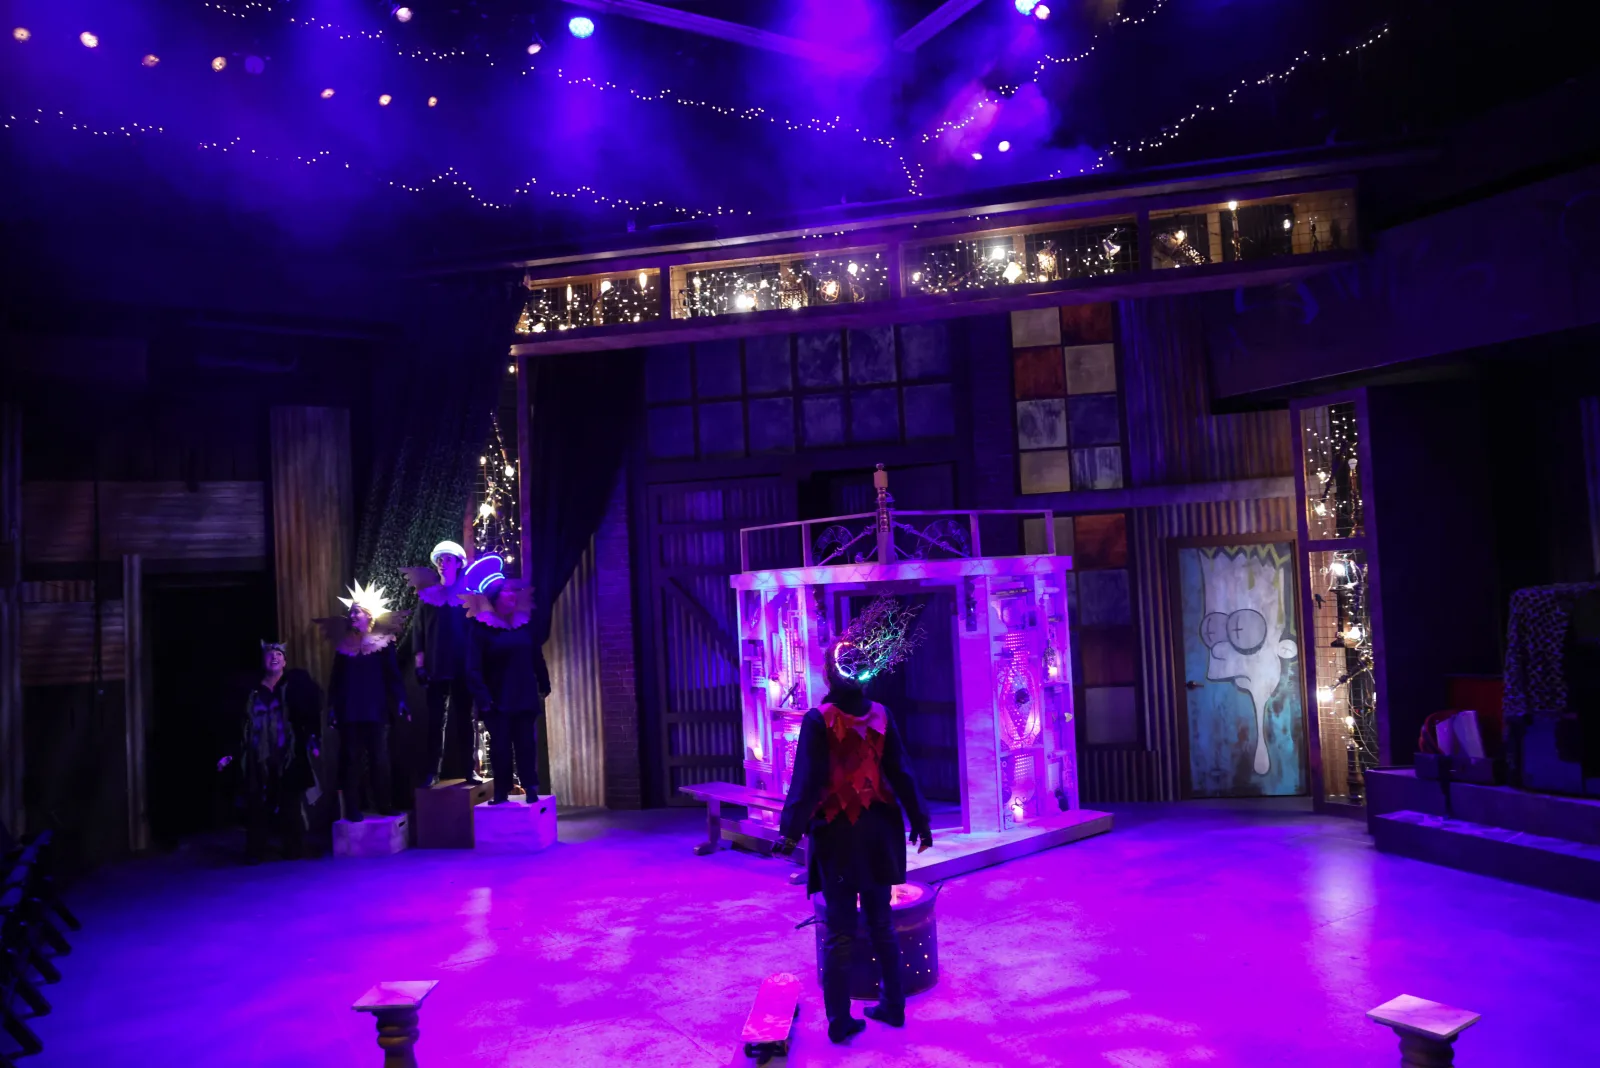
Bart gazes at the lit up set. Photo by Huth Photo.
Marge's Cerulean Isicholo
Marge’s headdress — a cerulean isicholo — had a similar build process to Bart’s crown: the main structure of the prop was constructed by the design team, and only then did I add the lighting effects. Unlike Bart’s crown, Marge’s headdress needed LED hardware I had limited experience with, and used much more labor intensive techniques to integrate the lights. The headdress used flexible LED filament (similar to what’s found in decorative LED lightbulbs) that was woven into the body of the isicholo in place of some of the original cording. Flexible LED filament is composed of a Polyimide base covered in surface mount LEDs — that is then coated in silicone for protection and flexibility. This design is extremely resilient everywhere except the tips, which are extremely breakable. This became problematic when the filament had to be fed through the small mesh openings of the headdress and pulled from the tip. After the first two weave-ins inevitably snapped while being threaded around the headdress I began using a different technique, soldering the ends to a thin silicone wire and covering the joint with a long piece of adhesive lined heat-shrink tubing. Threading with the silicone wire spread the pulling force across the body of the LED filament thanks to the long adhesive connection, and shrinking the tube with heat created a natural taper that would expand the holes in the isicholo’s mesh to accommodate the filament. This was still a lengthy process, with each “stitch” still requiring tweezers to navigate the mesh, but it was possible.
The filament also posed a control challenge. Unlike LED strip — which can run directly off a power source, at voltages as low as 3V, and be dimmed/brightened over software alone — LED filament like the kind in Marge’s headdress is a simpler type of LED and lacks integrated digital control. It also needs a higher voltage as well as managed current, and its power source needs to be adjusted directly in order to brighten or dim the LED. For this show, I had already been explicitly informed that the sole cue for these lights was to be a slow fade up from zero, and so analog dimming was a must have. Complicating things, Marge’s headdress was designed to use the same model of PCB as Bart which limited the output to only two pins. To achieve analog dimming, the independent strands of LED filament were organized into a top and bottom group, each of which was then hooked up to a circuit known as a CC driver that only required one pin for dimming each. The specific CC drivers I used were also necessary as they were capable of boosting the voltage to as high as 40 volts; the longest LED filament in the headdress needed 24V to turn on, and I had no other way of supplying that with my 3.3V microcontroller and 3.7V battery. Thankfully, the headdress had plenty of room inside to hold the CC drivers, as well as space for a large battery and even an extra power supply module to really push the lumen output. The headdress appeared to the board as two dimmable fixtures, representing the top filament and bottom two filaments.
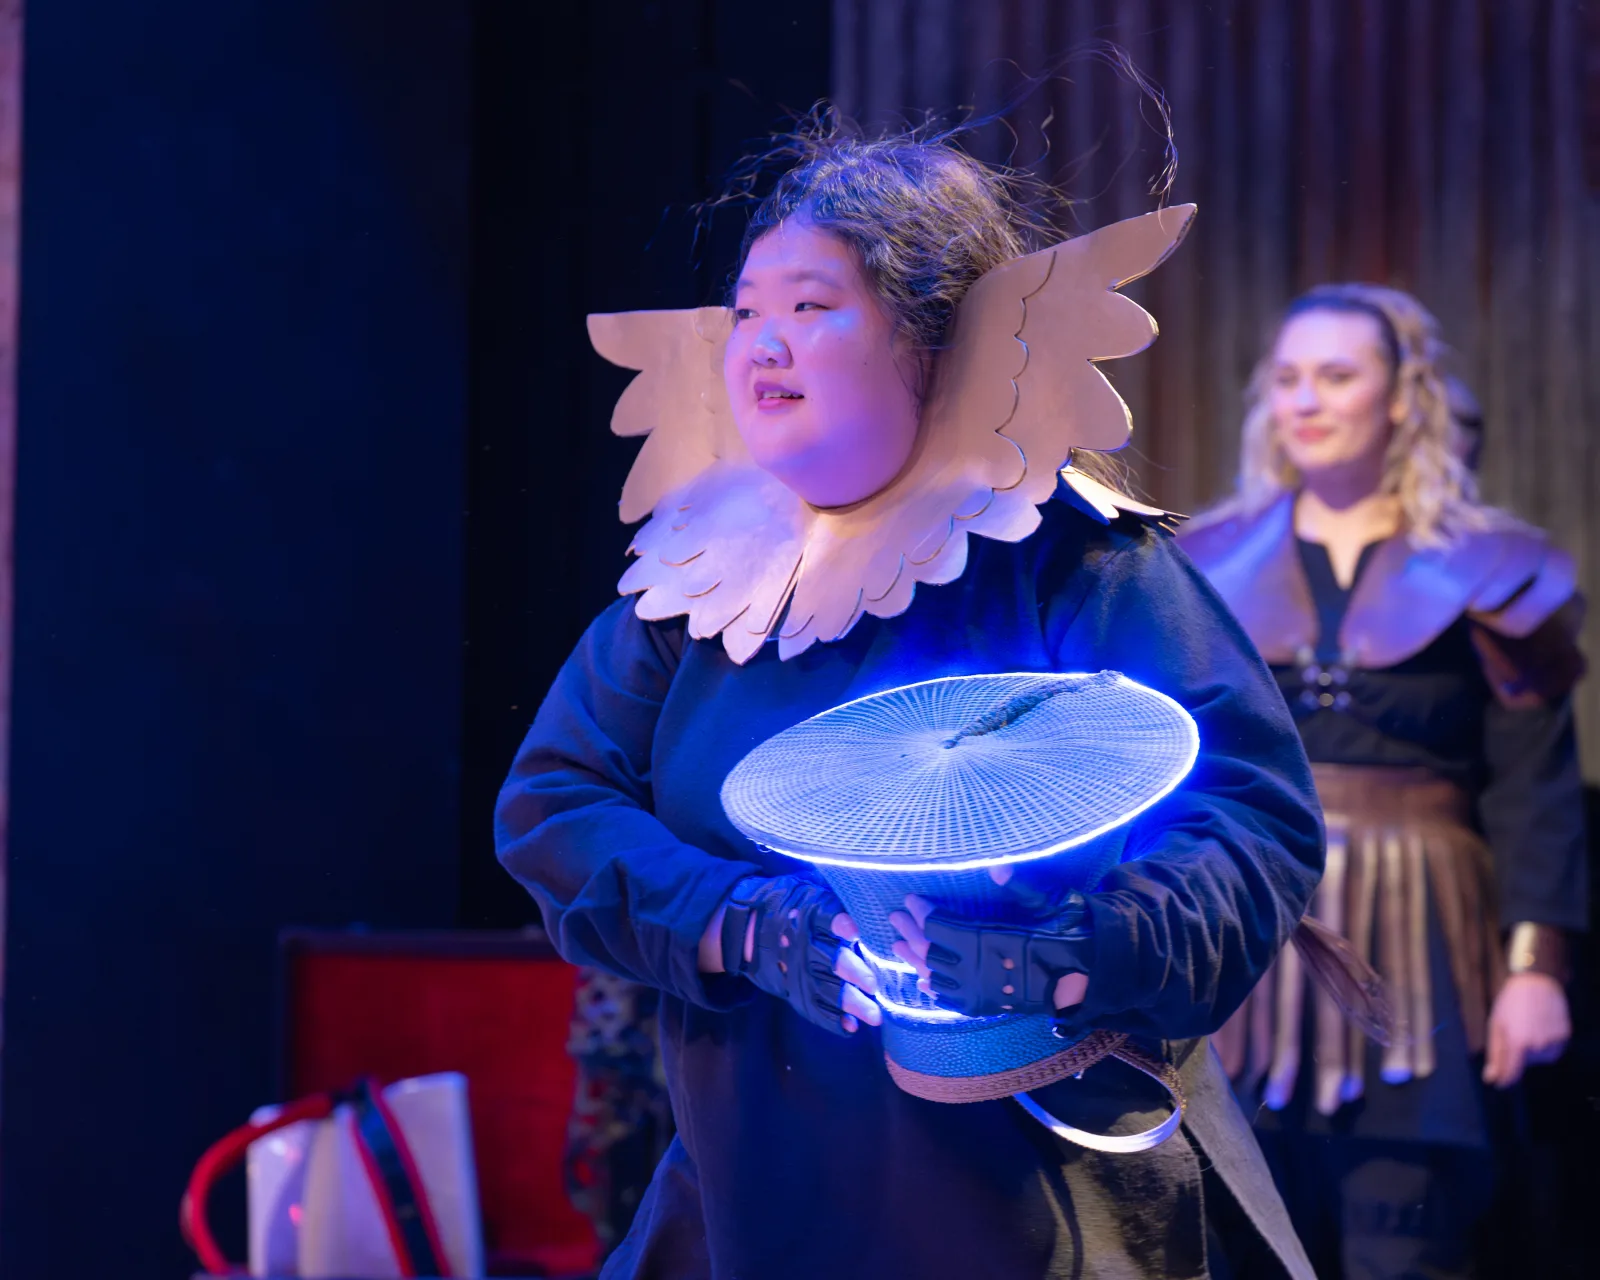
Marge's isicholo (with proud actor). Photo by Anthony Garza.
Homer's Helmet
The build processes for Lisa’s and Homer’s headpieces were distinct from those for Bart’s and Marge’s, as I was involved in the construction of Lisa’s crown as well as Homer’s helmet well before lights were installed into them. Derrick was interested in using 3D printing for some amount of the construction for some amount of the headpieces, and ultimately both Homer’s helmet and Lisa’s crown made heavy use of 3D printed parts, all of which I ended up modeling.
Homer’s design was the simplest of the two, and the simplest headpiece overall. I modeled an almost cartoon-like hardhat/helmet that was large enough to go over a thin plastic hardhat we had in the shop. The model was printed in four pieces in a transparent TPU filament (a flexible plastic) with a gyroid patterned infill, so the light shining through would reveal swirling patterns. Brass pins held the four pieces together in order to preserve its slight flexibility. The thinner hardhat was then covered in LED strip, with a microcontroller, power switch, and battery mounted as well. An inch-thick foam tape was applied onto the sides of the thinner hardhat, the flexible outer helmet stretched around the tape, and tacks stuck through the outer helmet and firmly into the foam. To preserve translucency while matching the other colors in the costume, I blended alcohol markers on the surface of the helmet. The helmet used addressable RGB LED strip like Bart’s crown, but I opted to have it appear to the board as one single-color dimmable fixture. This was so I could run a more complicated program on the microcontroller that simulated pulsing energy under the helmet — a flame-like orange/red that had streaks of crimson, yellow, and occasionally even nuclear green pulse along the surface.
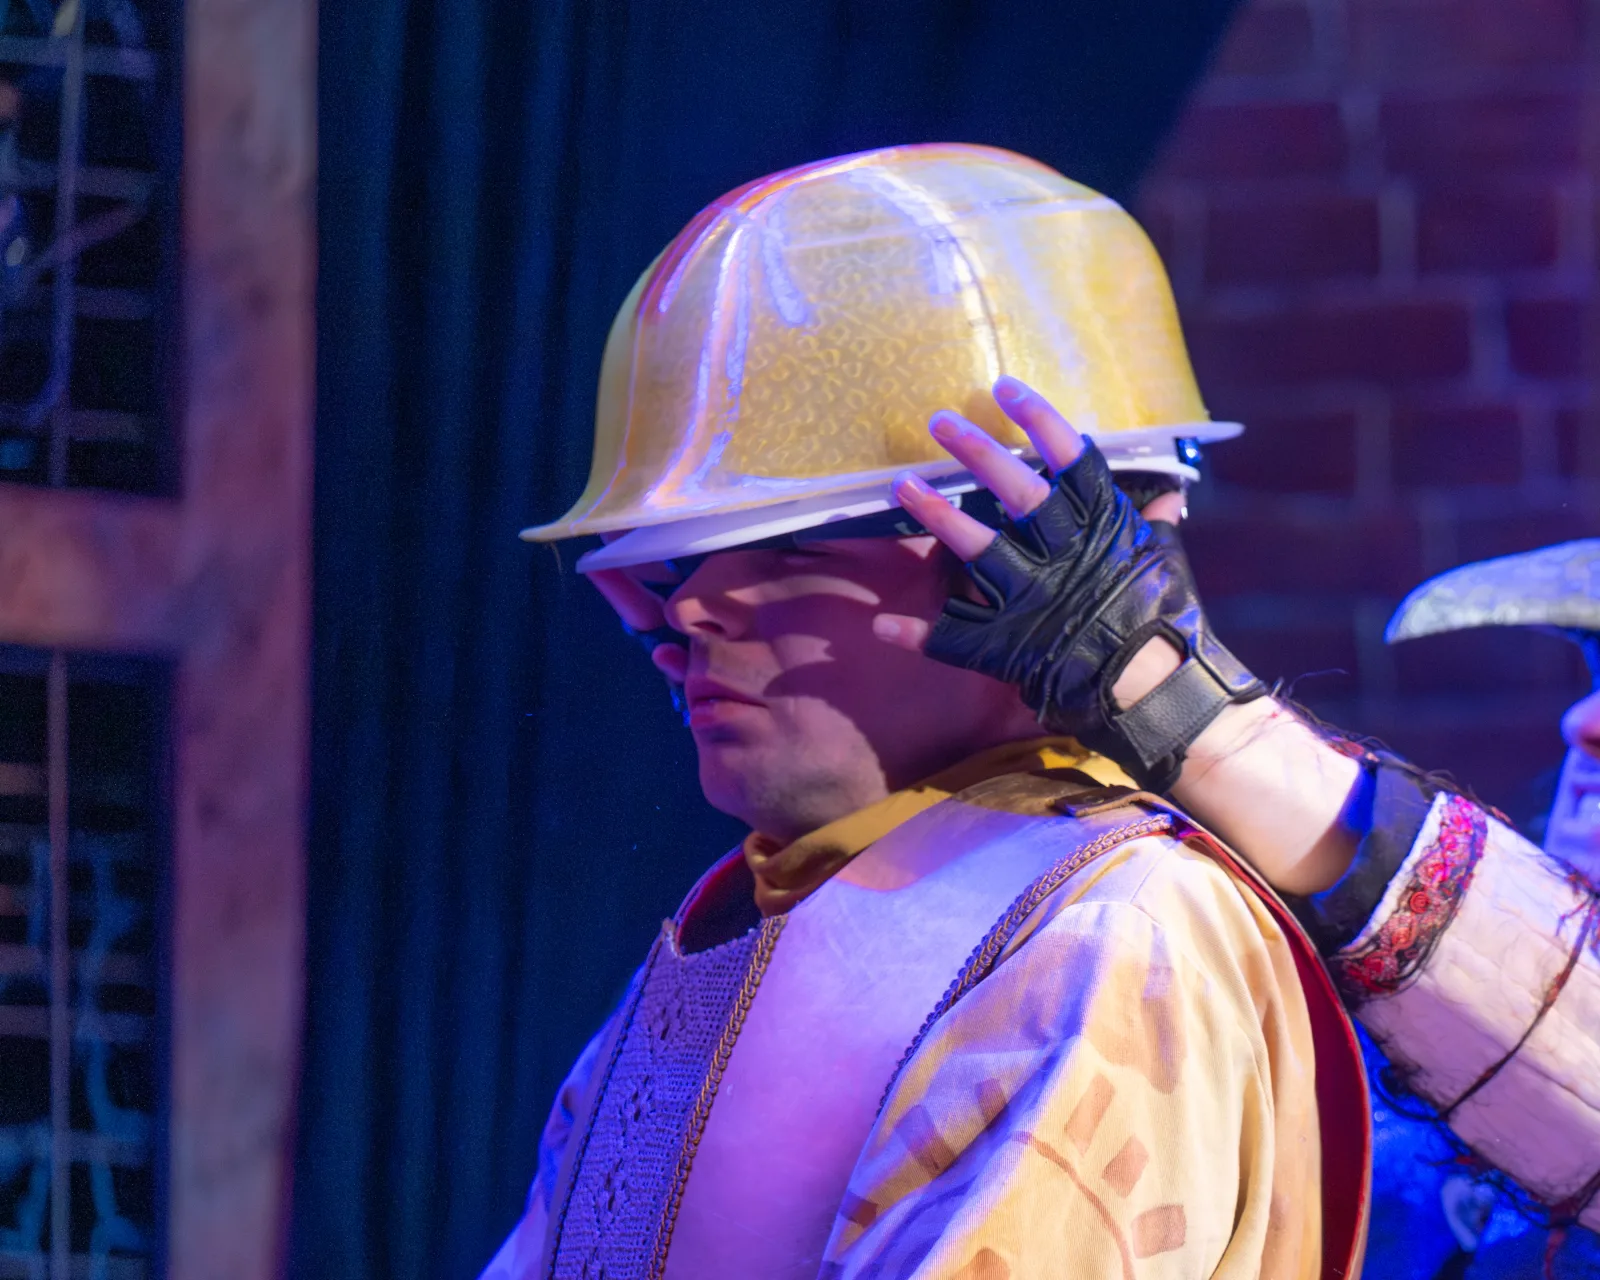
Homer is tortutred by the Nuclear Touch of Mr. Burns. Photo by Anthony Garza.
Lisa's Crown
The most significant technical achievement of the four headpieces is undoubtedly Lisa’s crown. Inspired by a Moravian Star, her geometric crown has 48 LEDs spread across 12 of her 16 spikes, which were also organized into 4 independent dimming zones with gorgeous brightness curves. The entire electronics system was contained within the body of the crown; a dense web of wires ran between the skull cap and the flexible, nearly-transparent spikes. Under the front two opaque spikes were two groups of two CC drivers (4 total). The back right opaque spike contained the system’s batteries, large enough to run at full brightness for two hours. The remaining opaque spike was attached with brass snaps so it could be removed by dressers to access the charging ports and power switches. Inside the translucent, light-emitting spikes, hard-body LED filaments (exactly the type found in LED lightbulbs) were suspended in TPU harnesses, attached in parallel with bare copper wire. The design of the crown required a careful balance of power and heat distribution, and ended up using two microcontrollers, to double its power supply, in order to properly illuminate the headpiece.
The crown’s look came together through a long prototyping process. Before manufacturing the crown that would make it onto stage, I had assembled a complete mockup of the design. It had 3D prints of a draft spike design and lights that shone from the base of the head outward through the spikes. Despite being approved by the designer, I was still unsatisfied with the brightness level from the skull-mounted lights. I had the idea to suspend the filaments in the center of the spikes. I tried prototyping one spike, and after about four attempts I made a harness and mounted the filaments, suspended in the center of the spike. Mounting the filaments in this way made a spike that was too bright to look directly into, and I had to shut my eyes after I couldn’t resist doing so. When my eyes were comfortable enough to open, I could see not only how my spike prototype currently looked, but also how the spike, and the crown, needed to look.
I fine-tuned my 3D printers to print slow and hot — a recipe for extracting plastic as transparent as possible. Simultaneously, however, I gave the spikes sharper edges, and the tight corners in a two-layer thick wall would concentrate the plastic so the sharp edges would look a more opaque white — I wanted to evoke broken glass. The fasteners for each spike were changed to delicate brass screws, suggesting the touch of an artisan. In combination with the glass-like spikes, this design seemed to suggest this angelic crown was handmade out of shattered lightbulbs. It is far and away the design I am proudest of.

Lisa's finished crown. Photo by Anthony Garza.
Lights In Action
Ultimately, the headpieces were a theatrical success, though that’s not to say the designs were perfect — admittedly, many aspects were over-engineered for the application. The integrated batteries were much larger than they needed to be; most headpieces could run at full brightness for hours, and even Bart’s twig crown, with the shortest battery life, was capable of running for 40 minutes with the lights on. These “over-engineered” aspects did end up mitigating some of the designs’ failures, the largest of which were durability and accessibility. While exceptionally durable in some areas, the microcontrollers — a constant point of contact for the dressers who switched them on/off and unplugged/plugged them in to charge every show — were very fragile. The charging port on Bart’s crown broke off after the penultimate show, and the device would have been nonfunctional if not for the battery being oversized enough to last through closing on the same charge.
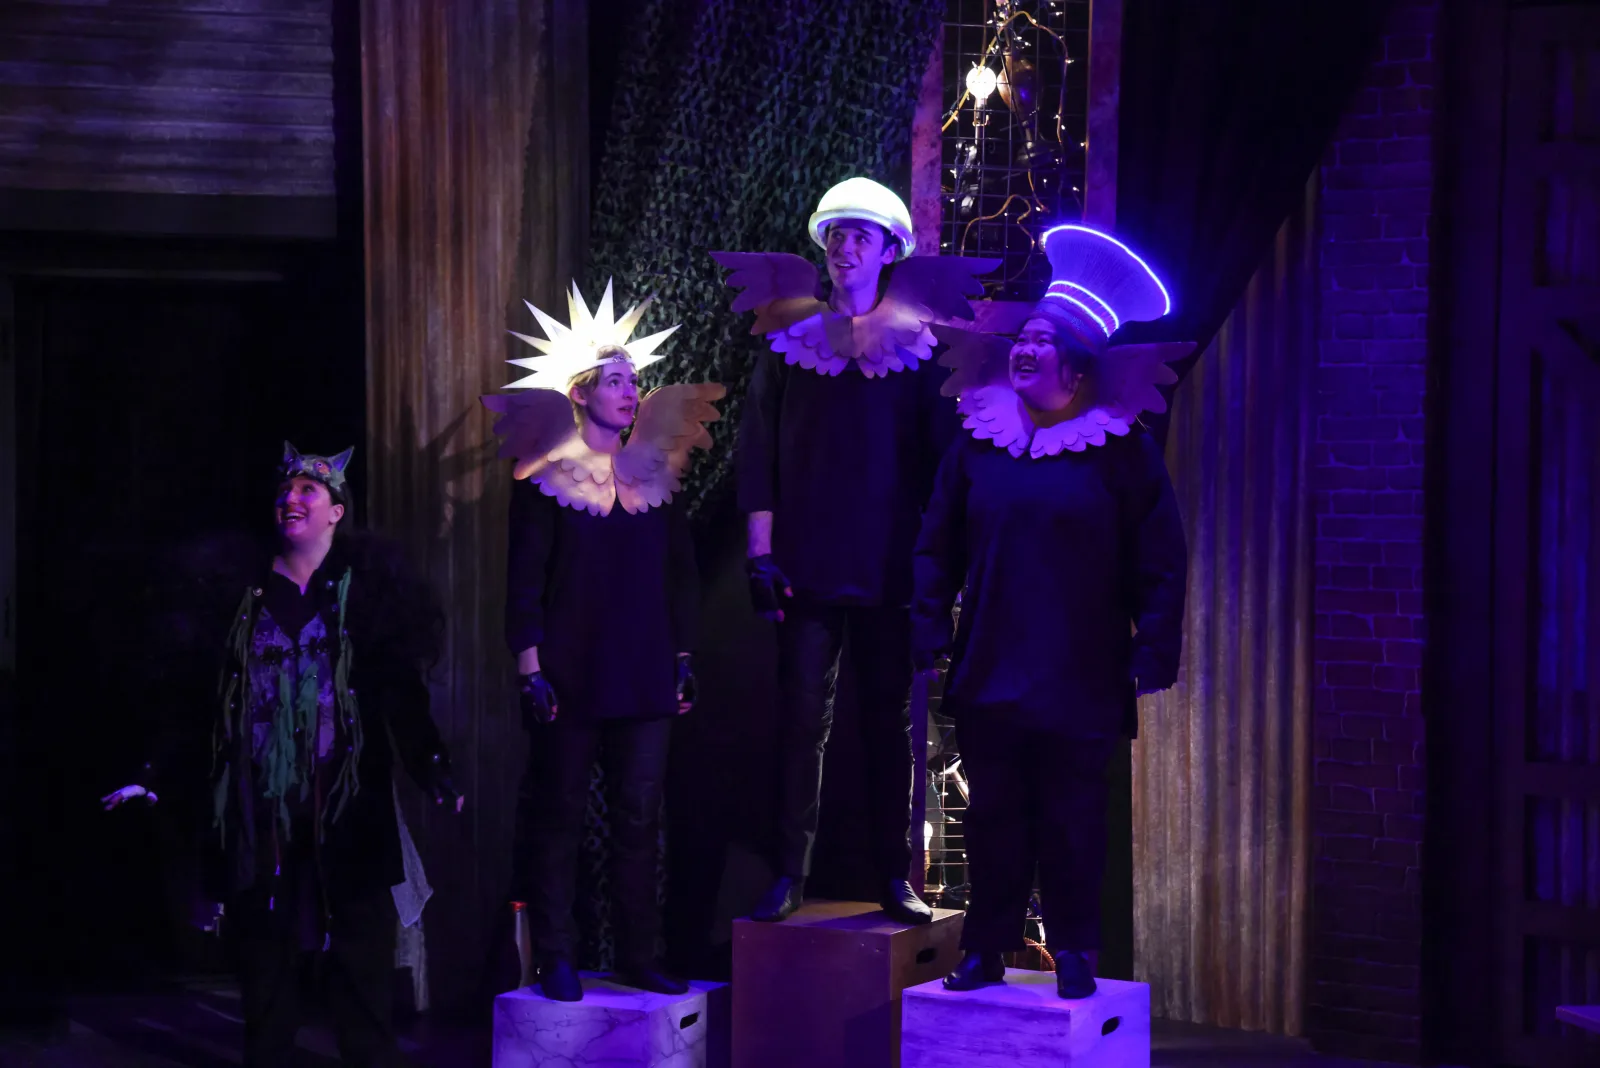
The headpieces in action. Photo by Huth Photo.